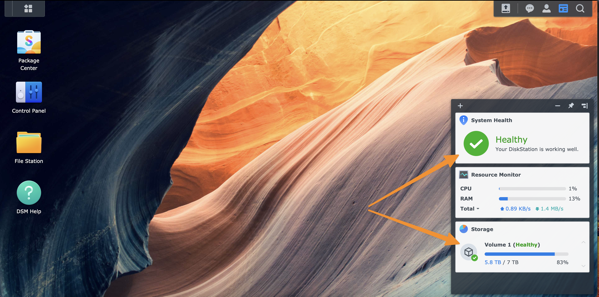
How to change the default 20% alert level
I started receiving low space alerts on my Synology DS718+ a few weeks ago. I checked and had about 1.3TB out of 7TB total of free space available but it had crossed the default 80% full level to trigger the low space alerts. Knowing that it took almost 5 years to get to 80% full, I wasn’t worried about running out of space anytime soon. I wanted to set the alert level to 90% full but had a difficult time finding that setting within the Synology software so I thought I would share the solution to hopefully save you some time.
Hardware: Synology DS718+ 2 Bay Synology with 2 8TB drives in Raid 1 configuration
Software: Synology DSM 7.1.1-42962 Update 6
Step 1: Open the app viewer
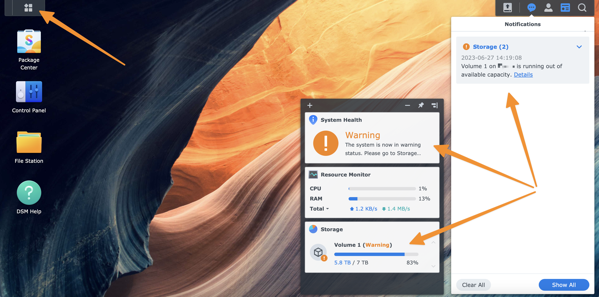
To change the alert level to something other than the 80% full default alert level, click on the app menu icon in the upper right of the DSM desktop.
Step 2: Open the storage manager application
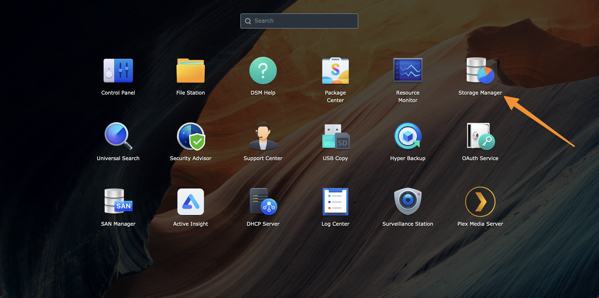
From the app menu, find and click on the storage manager application.
Step 3: Find the volume and settings to update
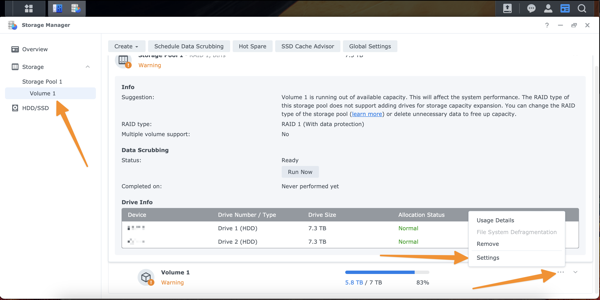
Click on the storage volume that is triggering the alert (Volume 1 in the screenshot) and scroll down to the bottom of the information pane. At the bottom of the information pane will be three horizontal dots - click on those and then click on the “Setting” from the menu that pops up.
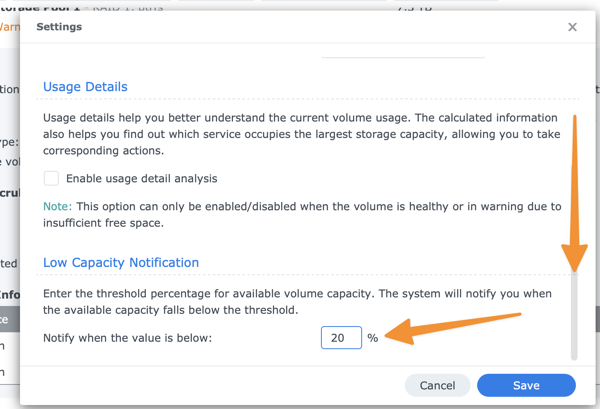
Step 4: Set the new alert threshold
Change the % free low capacity notification to the level you prefer. I changed it to 10%. Click the “Save” button to finalize the change.
The desktop widget and notifications should once again reflect a healthy volume.
